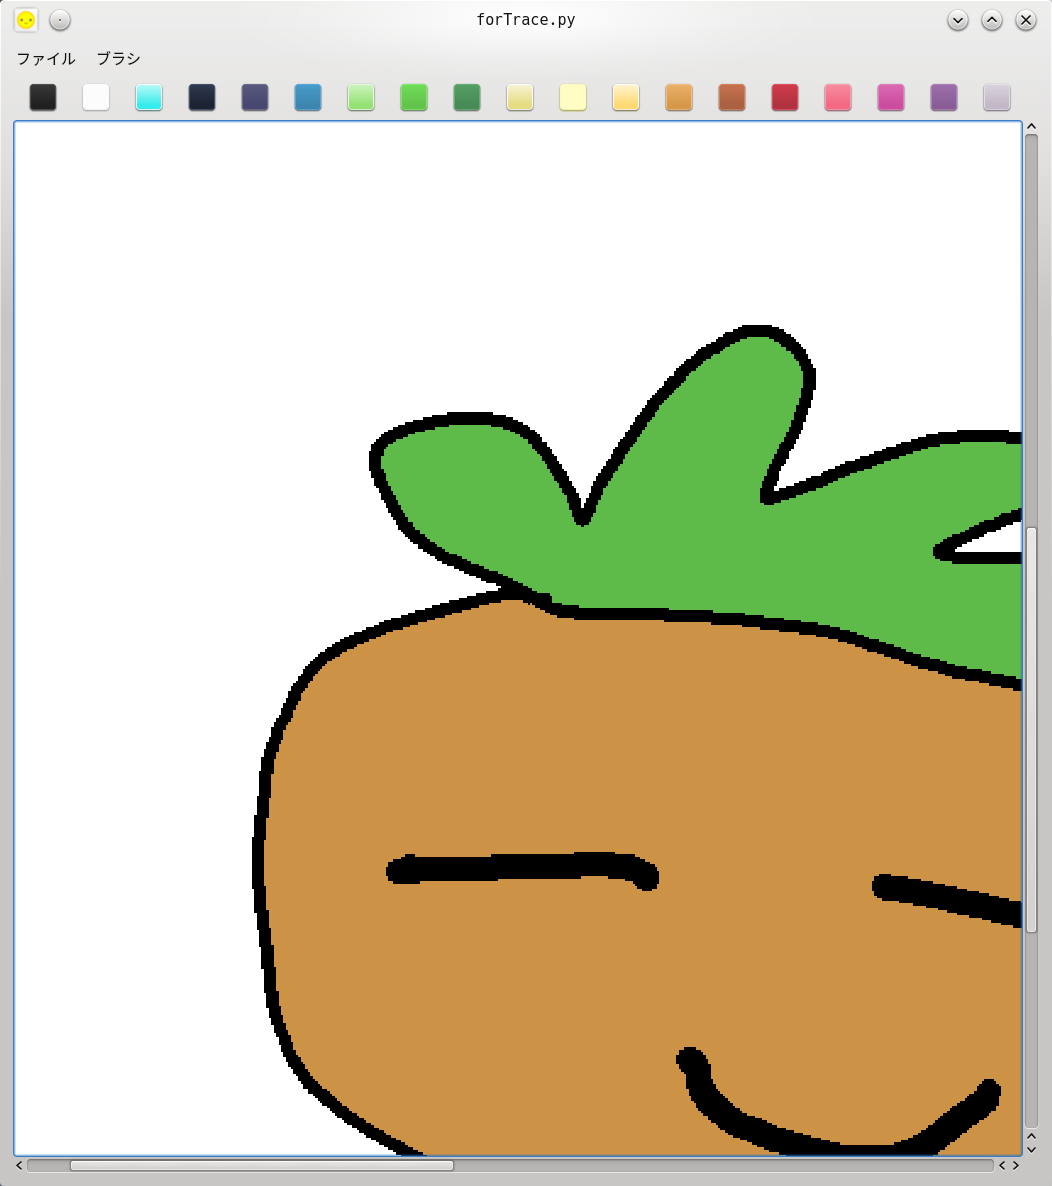
ズームとパンの実装で悪戦苦闘したけど、なんとか完成にこぎつけました。
このプログラムは、mmToolのスクリーンキャプチャをInkscapeでベクター化するための、途中のヘルパーアプリとして使う予定です。
forTrace.pyのコード
後で読みやすいようにたっぷりとコメントを残しました。いつの日か、どこかの誰かのお役に立てれば嬉しいです。
# forTrace.py 2025.09.14
# 手頃なアプリがないので自分で作ることにした。

'''
QGraphicsViewとQGraphicsSceneは、Qtフレームワークで2Dグラフィックスを扱うための主要なクラス。
複雑なグラフィカルな表示を作成するために使われる。

● QGraphicsSceneの役割
QGraphicsSceneは、すべてのグラフィックスアイテム(円、四角、テキスト、画像など)を保持するコンテナ。
複数のアイテムを管理し、衝突検知やアイテムの描画順序を決定する。
 ・アイテムの追加: scene.addItem(item)を使って、QGraphicsItemを継承したオブジェクトをシーンに追加。
 ・シーンのサイズ: シーンの有効範囲はsetSceneRect()で設定できる。

● QGraphicsViewの役割
QGraphicsViewは、QGraphicsSceneの内容を表示するためのウィジェット。
シーンを「窓」のように映し出し、ユーザーの操作(ズーム、パン、スクロール)を処理する。
 ・シーンの設定: view.setScene(scene)を使って、どのシーンを表示するかを設定。
 ・変換(Transform): ビューは、シーン座標系からウィジェット座標系への変換を管理する。これにより、ズームや回転、パンが可能になる。
 ・ユーザーインタラクション: マウスイベントやキーイベントを処理し、シーン内のアイテムに伝えることができる。

● 構造のイメージ
QGraphicsViewとQGraphicsSceneの関係は、**「キャンバスとフレーム」**のようなもの。
 ・QGraphicsScene: 絵を描くためのキャンバス。キャンバス上には、円、四角、テキストなどの「絵」が配置される。
 ・QGraphicsView: キャンバスを見るための**窓枠(フレーム)**。この窓枠を通して、キャンバスの一部、または全体を見る。
  窓を動かしたり、拡大・縮小したりすることで、キャンバスの異なる部分を見ることが可能になる。

● 質問
QGraphicsSceneに class Canvas(QLabel)で作ったオブジェクトを載せられますか。
 このcanvasではQPainterで色変更や線幅の選択、クリップボードからのペーストなどお絵描きの基本的な機能が収納されています。

Gemini: はい、できます。QGraphicsProxyWidgetクラスを使えば、QWidget (およびそれを継承する QLabel) を QGraphicsScene に配置し、
他のグラフィックスアイテムと同じように扱うことができます。
QGraphicsProxyWidgetは、QWidgetとQGraphicsItemの間のブリッジとして機能し、ウィジェットの座標変換、イベント処理、表示を自動的に管理します。
'''

import sys
from PyQt5.QtCore import    Qt, QPoint, QSize, QEvent
from PyQt5.QtGui  import   (QPainter, QImage, QPen, QColor, QIcon, QBrush,
                            QKeySequence, QPixmap, QMouseEvent,QClipboard,
                            QWheelEvent)
from PyQt5.QtWidgets import (QMainWindow, QApplication, QMenu, QMenuBar,
                            QAction, QFileDialog, QWidget,
                            QVBoxLayout, QHBoxLayout, QPushButton, QLabel,
                            QShortcut, QMessageBox, QGraphicsView, QGraphicsScene)

# 色リスト
COLORS = [
# 17 undertones https://lospec.com/palette-list/17undertones
'#000000', '#ffffff', '#35e3e3', '#141923', '#414168', '#3a7fa7', '#8fd970',
'#5ebb49', '#458352', '#dcd37b', '#fffee5', '#ffd035', '#cc9245', '#a15c3e',
'#a42f3b', '#f45b7a', '#c24998', '#81588d', '#bcb0c2'
]

# View: QGraphicsViewを継承するクラス。ズームとパンのロジックを実装できる。
class CustomGraphicsView(QGraphicsView):
    def __init__(self, parent=None):
        super().__init__(parent)
        #self.setRenderHint(QPainter.Antialiasing)  # アンチエイリアシングを有効にして描画を滑らかにする
        self.setDragMode(QGraphicsView.NoDrag)     # ドラッグモードを無効にして、マウス中ボタンでのパンを独自に実装する
        self.panning = False
        self.pan_start_point = QPoint()

    # マウスホィールイベントwheelEvent()をオーバーライドしてズーム機能を実装する
    # このメソッドはマウスホイールが回転したときに呼び出される。
    def wheelEvent(self, event):
        # ズームの係数を設定
        zoom_in_factor = 1.25
        zoom_out_factor = 1 / zoom_in_factor

        # ズームの中心点をマウスの位置に設定
        zoom_point = self.mapToScene(event.pos())
        self.setTransformationAnchor(QGraphicsView.AnchorUnderMouse)

        # ズームの方向を判定し、現在のスケールを更新
        if event.angleDelta().y() > 0:
            self.scale(zoom_in_factor, zoom_in_factor)
        else:
            self.scale(zoom_out_factor, zoom_out_factor)

    # mousePressEvent()、mouseMoveEvent()、mouseReleaseEvent() をオーバーライド
    def mousePressEvent(self, event):
        # 中ボタンでのパン機能
        if event.button() == Qt.MidButton:
            self.panning = True
            self.pan_start_point = event.pos()
            # カーソルを掴んだ手に変更
            QApplication.setOverrideCursor(Qt.ClosedHandCursor)
        # 右ボタンでリセット
        elif event.button() == Qt.RightButton:
            self.resetTransform()
        super().mousePressEvent(event)

    def mouseMoveEvent(self, event):
        if self.panning:
            # 視点の移動量を計算
            delta = self.mapToScene(event.pos()) - self.mapToScene(self.pan_start_point)
            # ビューを移動
            self.setTransformationAnchor(QGraphicsView.NoAnchor)
            self.translate(delta.x(), delta.y())
            self.pan_start_point = event.pos()
        super().mouseMoveEvent(event)

    def mouseReleaseEvent(self, event):
        if event.button() == Qt.MidButton:
            self.panning = False
            QApplication.restoreOverrideCursor()
        super().mouseReleaseEvent(event)

# Canvas: QPainterで描画機能を持つカスタムQLabelクラス
class Canvas(QLabel):
    # 初期化
    def __init__(self):
        super().__init__()
        width = 1024
        height = 1024
        self.setGeometry(0, 0, width, height)
        QApplication.setOverrideCursor(Qt.ArrowCursor)

        # 描画用のQPixmapを初期化
        self.image = QPixmap(width, height)
        self.image.fill(QColor("white"))
        self.setPixmap(self.image)

        # モード設定
        self.mode = "draw"   # デフォルトは描画モード

        # 初期値
        self.last_x, self.last_y = None, None
        self.pen_color = QColor('#000000')
        self.pen_size = 5
        self.drawing = False

        # Undo履歴
        self.undo_stack = []
        self.max_undo = 32

        # クリップボード
        self.clip = QApplication.clipboard()

        # ショートカット登録
        QShortcut(QKeySequence("Ctrl+Z"), self, activated=self.undo)
        QShortcut(QKeySequence("Ctrl+F"), self, activated=self.setFillMode)
        QShortcut(QKeySequence("Ctrl+V"), self, activated=self.pasted)
        QShortcut(QKeySequence("Ctrl+D"), self, activated=self.brushAgain)

    # ブラシ、フィルの色を変える
    def set_pen_color(self, c):
        self.pen_color = QColor(c)

    # ブラシの太さ
    def set_pen_size(self, pix):
        self.mode = "draw"
        self.pen_size = pix
        QApplication.setOverrideCursor(Qt.ArrowCursor)

    # フィルモードのフラグ
    def setFillMode(self):
        self.mode = "fill"
        QApplication.setOverrideCursor(Qt.CrossCursor)

    # ブラシの初期値に戻す(色はそのままの方がいいかな)
    def brushAgain(self):
        self.mode = "draw"
        QApplication.setOverrideCursor(Qt.ArrowCursor)
        self.set_pen_size(5)
        #self.set_pen_color(QColor('#000000'))

    # マウスボタンを押したとき、塗りつぶしまたはクリック点の色を拾う
    def mousePressEvent(self, e):
        # モードが"fill"なら
        if e.button() == Qt.LeftButton and self.mode == "fill":
            self.flood_fill(e.pos(), self.pen_color)

        # Ctrlキーが押されているか確認
        if e.modifiers() == Qt.ControlModifier:
            x = e.x()
            y = e.y()
            # QPixmapをQImageに変換
            img = self.image.toImage()
            # 座標が有効な範囲内かチェック
            if 0 <= x < img.width() and 0 <= y < img.height():
                # pixelColor()メソッドで色を取得
                color = img.pixelColor(x, y)
                # ペンの色を変更
                self.set_pen_color(color)
                # 画面を再描画して、新しいペンの色を反映させる
                self.update()

    # 普通に線を引く処理
    def mouseMoveEvent(self, e):
        if self.mode == "draw" and not e.button() == Qt.MidButton:
            if self.last_x is None: # First event.
                self.saveUndo()  # 直近の状態を保存
                self.last_x = e.x()
                self.last_y = e.y()
                return # Ignore the first time.

            painter = QPainter(self.pixmap())
            #painter.setRenderHint(QPainter.Antialiasing, True)
            p = painter.pen()
            p.setWidth(self.pen_size)   # 整数
            p.setColor(self.pen_color)
            p.setCapStyle(Qt.RoundCap)
            p.setJoinStyle(Qt.RoundJoin)
            painter.setPen(p)
            painter.drawLine(self.last_x, self.last_y, e.x(), e.y())
            painter.end()
            self.update()

            # Update the origin for next time.
            self.last_x = e.x()
            self.last_y = e.y()

    # マウスボタンをリリースしたら
    def mouseReleaseEvent(self, e):
        self.last_x = None
        self.last_y = None

    # Undo保存
    def saveUndo(self):
        if len(self.undo_stack) >= self.max_undo:
            self.undo_stack.pop(0)      # 最大数を超えたら古いのから削除
        self.undo_stack.append(self.pixmap().copy())  # QPixmap.copy()でOK

    # Undo実行
    def undo(self):
        if self.undo_stack:
            prev_pixmap = self.undo_stack.pop()
            self.image = prev_pixmap
            self.setPixmap(self.image)
            self.update()

    # ペーストフラグ
    def pasted(self):
        self.mode = "draw"
        QApplication.setOverrideCursor(Qt.ArrowCursor)
        self.load_image_to_canvas("pasted")

    # 外部画像をキャンバスに設定する
    def load_image_to_canvas(self, path):
        self.mode = "draw"
        QApplication.setOverrideCursor(Qt.ArrowCursor)
        if path == "pasted":
            mime_data = self.clip.mimeData()

            # クリップボードに画像データがない時は白紙を表示
            loaded_pixmap = QPixmap(self.size())
            loaded_pixmap.fill(QColor("white")) # 背景を白で塗りつぶす

            if mime_data.hasImage():
                loaded_pixmap = QPixmap.fromImage(mime_data.imageData())
        else:
            loaded_pixmap = QPixmap(path)

        if not loaded_pixmap.isNull():
            # 新しいQPixmapを作成し、キャンバスのサイズに合わせる
            new_image = QPixmap(self.size())
            new_image.fill(QColor("white")) # 背景を白で塗りつぶす

            # QPainterを使用して、読み込んだ画像を新しいQPixmapに描画
            painter = QPainter(new_image)

            # 画像をキャンバスのサイズに合わせてスケール
            scaled_pixmap = loaded_pixmap.scaled(self.size(), Qt.KeepAspectRatio, Qt.FastTransformation)

            # 描画開始位置を計算して中央に配置
            x_offset = (new_image.width() - scaled_pixmap.width()) // 2
            y_offset = (new_image.height() - scaled_pixmap.height()) // 2

            painter.drawPixmap(x_offset, y_offset, scaled_pixmap)
            painter.end()

            self.image = new_image
            self.setPixmap(self.image)
            self.update()
            return True
        return False

    # キャンバスをクリア
    def clear_canvas(self):
        # QPixmapオブジェクトを新しく作成して、白で塗りつぶす
        self.image = QPixmap(self.size())
        self.image.fill(QColor("white"))
        self.setPixmap(self.image)
        self.update()
        self.brushAgain()

    # クリック位置から同じ色の領域を塗りつぶす
    def flood_fill(self, start_pos, new_color):
        '''
        # https://www.pythonguis.com/faq/implementing-qpainter-flood-fill-pyqt5pyside/
        #1 Start with our start pixel, fill colour, and two empty lists seen and queue.
        #2 Look at our current pixel's colour. This is the target for our fill. Store this initial location in queue.
        #3 Taking the first item from queue (initially our start (x,y) location) look at each of the 4 pixels surrounding our location (cardinal points)
        #4 If they have not been previously seen — compare their colour to the one we're looking for.
        #5 If they match, add the (x,y) location to queue and update the pixel with the fill colour.
        #6 Add the (x,y) location to seen to keep track of where we've looked before (and avoid the overhead of looking again).
        #7 Repeat from step 3, until the queue is empty.
        '''

        #1 開始ピクセル、new_color、および空のリスト「have_seen」と「queue」を用意する
        image = self.pixmap().toImage()
        w, h = image.width(), image.height()
        x, y = start_pos.x(), start_pos.y()
        w, h = image.width(), image.height()
        have_seen = set()
        queue = [(x, y)]    # 初期位置
        if not (0 <= x < w and 0 <= y < h):
            # クリック位置がキャンバス内になければ何もしない
            return

        #2 現在のピクセルの色を確認。これが塗りつぶしの対象となる。
        target_color = image.pixelColor(x, y)
        if target_color == new_color:
            # 塗り色(new_color)と同色なら何もしない
            return

        while queue:
            #3 キューから直近のアイテムを取り出す(初期状態では開始位置 x, y)。その位置を囲む4つのピクセル(四方位)を取得
            cx, cy = queue.pop()  # popでキュー・リストから抜き出される
            neighbors = [(cx + 1, cy), (cx - 1, cy), (cx, cy + 1), (cx, cy - 1)]    # 右・左・上・下

            #4 四方位のピクセルについて確認
            #  未確認であって、nxが0以上w未満、nyが0以上h未満の時に次の処理をする
            #  そのピクセルの色とtarget_colorを比較
            for nx, ny in neighbors:
                if (nx, ny) not in have_seen and 0 <= nx < w and 0 <= ny < h:
                    current_color = image.pixelColor(nx, ny)
                    if current_color == target_color:
                        #5 target_colorと同色であれば(x,y)の位置をキューに追加し、そのピクセルをnew_colorで更新
                        queue.append((nx, ny))
                        image.setPixelColor(nx, ny, new_color)
                        #6 (x,y)の位置を「have_seen」に追加し、確認済みの場所を記録 再度確認するオーバーヘッドを回避
                        have_seen.add((nx, ny))

                        #7 ステップ3から繰り返し、キューが空になるまで続ける

        self.image = QPixmap.fromImage(image)
        self.setPixmap(self.image)
        self.update()
        self.saveUndo()     # Undoスタックにコピーを追加


# Paletteクラス
class QPaletteButton(QPushButton):
    def __init__(self, color):
        super().__init__()
        self.setFixedSize(QSize(32,32))
        self.color = color
        self.setStyleSheet("background-color: %s;" % color)


# メインウィンドウ
class MainWindow(QMainWindow):
    def __init__(self):
        super().__init__()
        # ウィンドウの初期サイズを指定
        self.resize(1040, 1140)

        # タイトルとアイコン
        title = "forTrace.py"
        icon = "icons/face-button.png"
        self.setWindowTitle(title)
        self.setWindowIcon(QIcon(icon))

        # QGraphicsViewとQGraphicsSceneのセットアップ
        self.view = CustomGraphicsView()
        self.scene = QGraphicsScene()

        # シーンのサイズをセット (Canvasのサイズに合わせて設定)
        canvas_width = 1024
        canvas_height = 1024
        self.scene.setSceneRect(0, 0, canvas_width, canvas_height)

        # ビューにシーンを設定
        self.view.setScene(self.scene)

        # キャンバスを作成
        self.canvas = Canvas()
        self.canvas.setFixedSize(canvas_width, canvas_height)

        # QGraphicsSceneにCanvasウィジェットを追加
        self.proxy_widget = self.scene.addWidget(self.canvas)

        # ウィジェット配置
        w = QWidget()
        l = QVBoxLayout()

        # パレット
        palette = QHBoxLayout()
        self.add_palette_buttons(palette)
        l.addLayout(palette)

        # QGraphicsViewをレイアウトに追加
        l.addWidget(self.view)

        w.setLayout(l)
        self.setCentralWidget(w)

        # ズームとパンの機能を有効にするために、フォーカスを設定
        self.view.setFocusPolicy(Qt.WheelFocus)

        # メニュー
        mainMenu = self.menuBar()
        fileMenu = mainMenu.addMenu("ファイル")
        brushes  = mainMenu.addMenu("ブラシ")

        # アクション登録
        loadAction = QAction(QIcon("icons/load-button.png"), "読込",self)
        loadAction.setShortcut("Ctrl+O")
        fileMenu.addAction(loadAction)
        loadAction.triggered.connect(self.load)

        saveAction = QAction(QIcon("icons/save-button.png"), "保存",self)
        saveAction.setShortcut("Ctrl+S")
        fileMenu.addAction(saveAction)
        saveAction.triggered.connect(self.save)

        clearAction = QAction(QIcon("icons/delete-button.png"), "クリア", self)
        clearAction.setShortcut("Ctrl+C")
        fileMenu.addAction(clearAction)
        clearAction.triggered.connect(self.clear)

        pix1Action = QAction( QIcon("icons/pixel-1.svg"), "2px", self)
        brushes.addAction(pix1Action)

        pix5Action = QAction( QIcon("icons/pixel-5.svg"), "5px", self)
        brushes.addAction(pix5Action)

        pix10Action = QAction( QIcon("icons/pixel-10.svg"), "10px", self)
        brushes.addAction(pix10Action)

        pix20Action = QAction( QIcon("icons/pixel-20.svg"), "20px", self)
        brushes.addAction(pix20Action)

        fillAction = QAction( QIcon("icons/fill.svg"), "フィル", self)
        brushes.addAction(fillAction)

        pix1Action.triggered.connect(lambda: self.canvas.set_pen_size(2))   # 極細
        pix5Action.triggered.connect(lambda: self.canvas.set_pen_size(5))   # 細
        pix10Action.triggered.connect(lambda: self.canvas.set_pen_size(10)) # 太
        pix20Action.triggered.connect(lambda: self.canvas.set_pen_size(20)) # 極太
        fillAction.triggered.connect(self.canvas.setFillMode)

    # 読込
    def load(self, file_path):
        # 直前のブラシ/フィルにかかわらずブラシを初期化
        QApplication.setOverrideCursor(Qt.ArrowCursor)
        self.canvas.brushAgain()

        if file_path:
            filePath = file_path
        else:
            # ファイルダイアログを開き、画像ファイルを選択
            filePath, _ = QFileDialog.getOpenFileName(
                self,
                "画像を読み込む",
                "",
                "Image Files (*.png *.jpg *.jpeg *.bmp);;All Files (*.*)"
            )

        if not filePath:
            return

        if not self.canvas.load_image_to_canvas(filePath):
            QMessageBox.warning(self, "エラー", "画像の読み込みに失敗しました。")

    # 保存
    def save(self):
        # 直前のブラシ/フィルにかかわらずブラシを初期化
        QApplication.setOverrideCursor(Qt.ArrowCursor)
        self.canvas.brushAgain()

        filePath, _ = QFileDialog.getSaveFileName(self, "Save Image", "", "BMP(*.bmp);;PNG(*.png);;JPEG(*.jpg *.jpeg);;All Files(*.*) ")
        if filePath == "":
            return

        # キャンバスからQPixmapを取得
        pixmap = self.canvas.pixmap()
        if pixmap.isNull():
            # pixmapが存在しない場合は警告を表示して終了
            QMessageBox.warning(self, "エラー", "保存する画像がありません。")
            return
        pixmapSmall = pixmap.scaled(512, 512, Qt.KeepAspectRatio)
        pixmapSmall.save(filePath)   # 元サイズはトレースした時ギザギザが多すぎるので縮小して保存

    # クリア
    def clear(self):
        self.canvas.clear_canvas()

    # パレット
    def add_palette_buttons(self, layout):
        for c in COLORS:
            b = QPaletteButton(c)
            b.pressed.connect(lambda c=c: self.canvas.set_pen_color(c))
            layout.addWidget(b)


#.......................................................................#
# アプリケーションのエントリーポイント
if __name__ == "__main__":
    # コマンドライン引数にファイルパスが指定されているか確認
    app = QApplication(sys.argv)
    window = MainWindow()
    if len(sys.argv) > 1:
        file_path = sys.argv[1]
        window.load(file_path)
    window.show()
    sys.exit(app.exec_())
線幅は4種類、塗りつぶしも実装できた
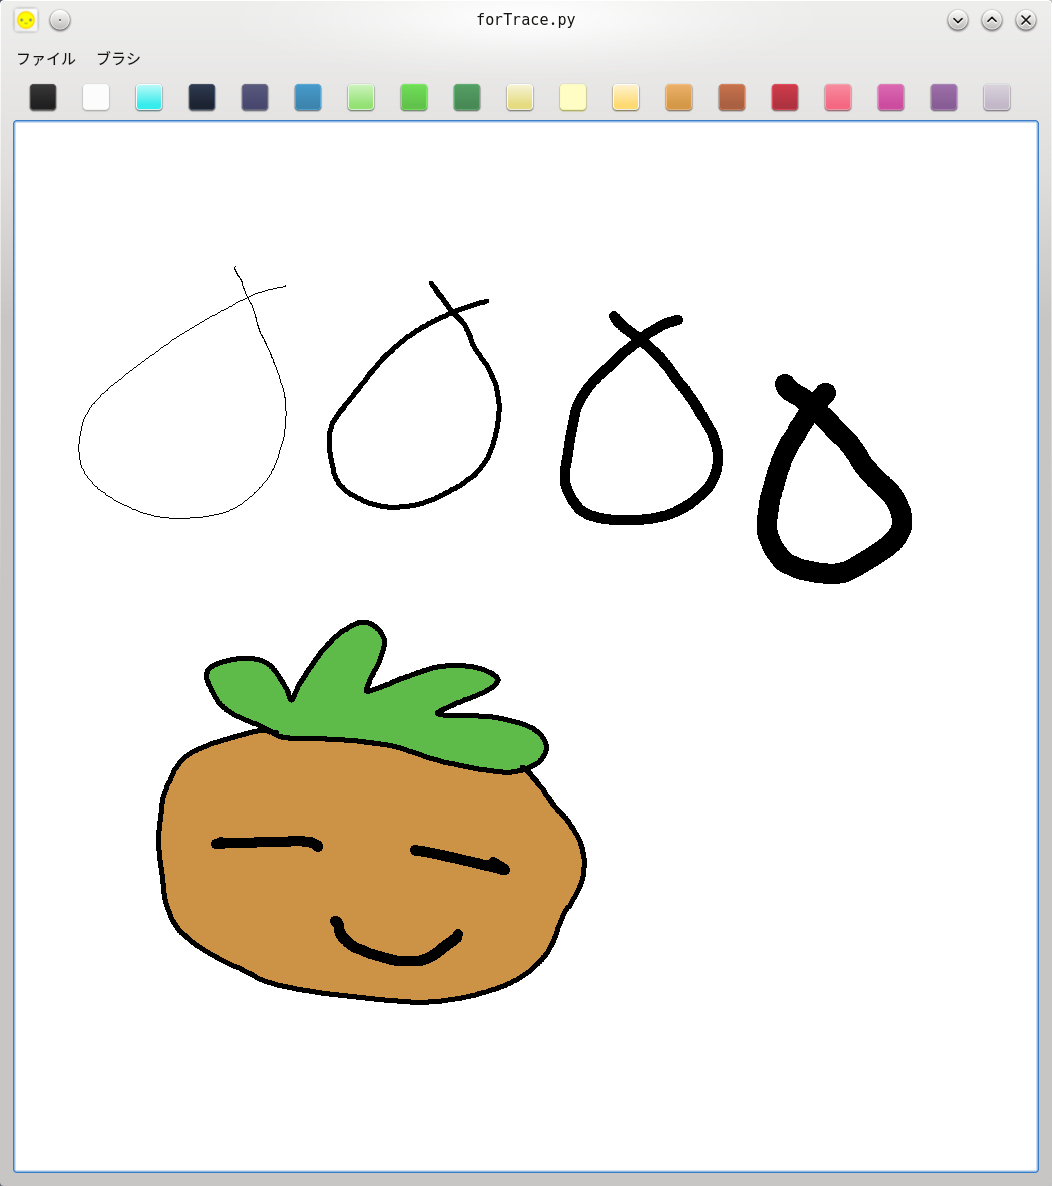
マウスホィールでズーム、中ボタンドラッグでパン